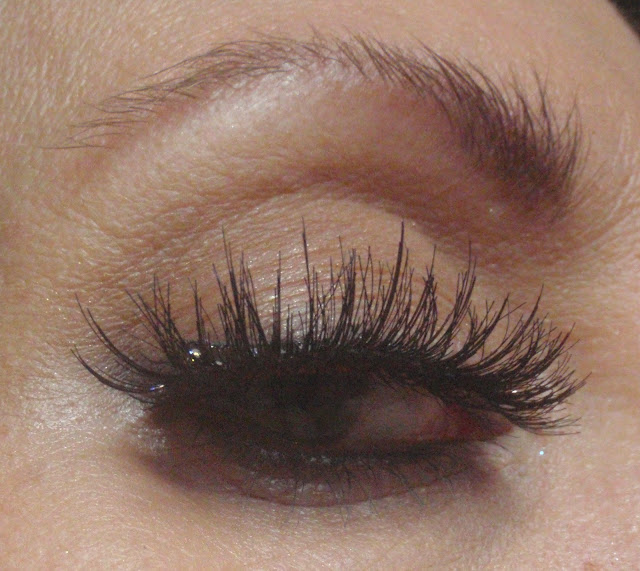
False lashes are one of the easiest ways to create huge drama with your eye makeup. They aren't difficult to apply. You just need a steady hand and patience!
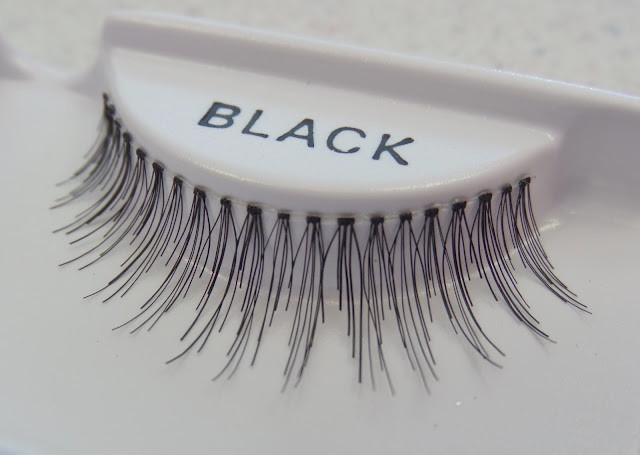
There are many styles of strip lashes to choose from simple, natural looking to thick, long and dramatic. There are demi length lashes which accentuate the outer portion of the lash line and full length lashes which cover the full length of the lash line.
Some have bands that are "invisible" and some have thick black bands that look like eye liner.
You can even apply two layers of strip lashes for a spectacular effect!
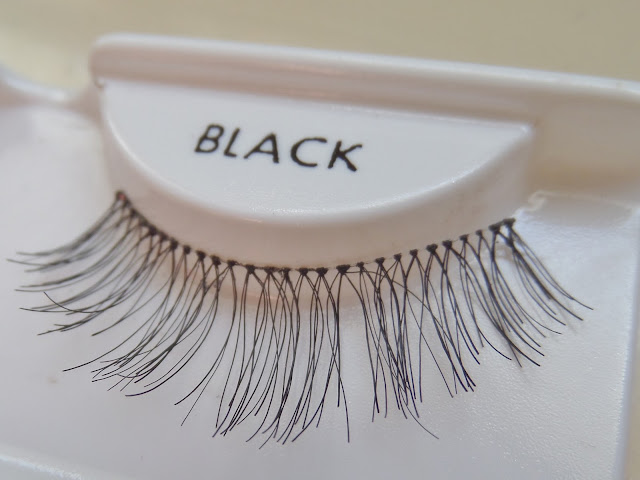
Some have lashes that are uneven lash hairs lengths.
Some have lash hairs that are more even in length.
Some are fine and delicate looking some are thick and bold. Most strip lashes come in black but you can find them in colors including blue, green and wine.
Then, there are fancy glittery lashes!
There are even magnetic false lashes! I can never get these things on right!!! That's a post for another day.
There are also different lash glues you can use.
There are also different lash glues you can use.
The original strip lash adhesives contained latex.
Many people are allergic to latex and cannot use them.
There are some good non latex adhesives that hold the lashes just as well as latex adhesives.
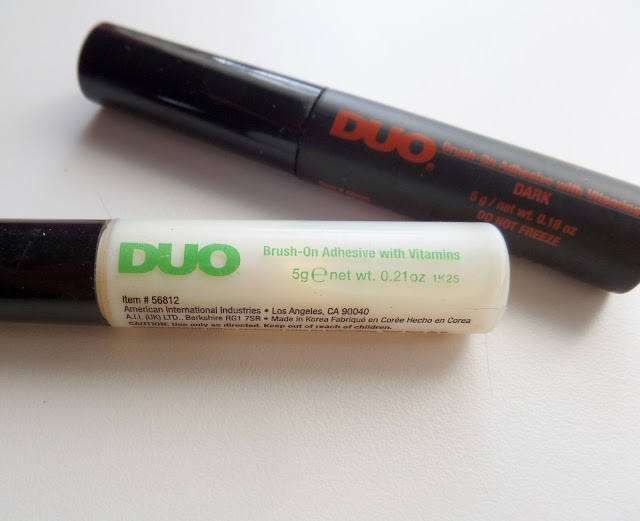
I like Ardell Duo Brush-On Striplash Adhesive in white/clear. It's latex free and holds the lashes on very well. Duo Lash Glue comes in white/clear and dries clear and black as well that dries black.
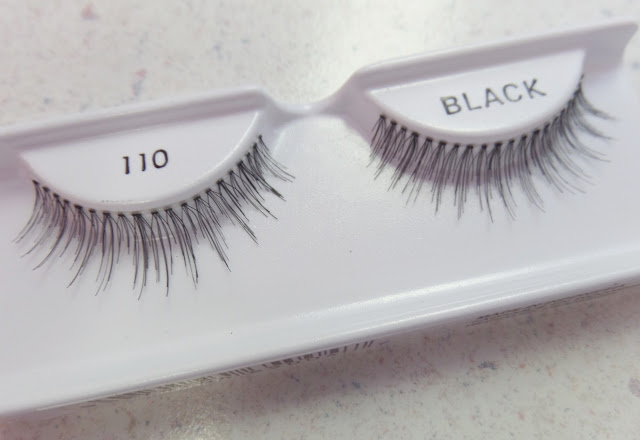
The strip lashes I use most for brides and their bridal party are Ardell Strip Lashes 110. They have lash hairs that are uneven lengths and create a natural yet flirty look. Ardell lashes are made of sterilized human hair.
Fit the Strip
The band on the strip lash may be too long for your eye. The lash band will be slightly tacky when you remove the lash from the packaging. It will stick in place on your eye to fit the lash to your eye length.
Line up the band of the lashes on the inner part of your eye so it looks good and feels comfortable. Use your fingers to hold the outer end of the lashes to mark where the band should be shortened.
Remove the lash from your eye. Trim the band of the lash strip from its outer edge. Hold the lash to your eye again to check that the length is right.
Shadow
Apply your eye shadow.
Liner
Apply black pencil liner to your upper lash line to help
conceal the false lash band. Get the pencil in between the lashes to create a nice solid line. Tight lining is a great way to get good eye liner coverage in the lash line. Tight lining is applying eye liner from underneath the lash line instead of on top of the lash line.
Curl & Mascara
Curl your lashes, apply a coat of black mascara and let it dry. I prefer waterproof mascara because it tends to hold the lash curl better than non waterproof mascara. This creates the perfect guide to lay the strip lash on. My favorite waterproof mascara to Too Faced Better Than Sex Waterproof Mascara.
Click here to read Too Faced Better Than Sex Waterproof Mascara Review
Apply the Lashes
Hold the strip lash with tweezers or your fingers. Apply a thin layer of lash glue to the lash strip and let it become tacky. Wait 30 seconds to a minute. Apply the lash strip to the skin close to your upper lashes, press it gently in place, and hold it for a few seconds to set.
If the lash is not in the right place and feels uncomfortable, it will easily peel off so you can reapply it. You may need to touch up your shadow and liner before you reapply the lash.
Liner
Once your lashes are comfortably in place and dry, use an eye liner brush to apply black or dark brown powder eye shadow on top of the lash band to hide it.
The strip lashes I use most for brides and their bridal party are Ardell Strip Lashes 110. They have lash hairs that are uneven lengths and create a natural yet flirty look. Ardell lashes are made of sterilized human hair.
How to Apply Strip Lashes
Fit the Strip
The band on the strip lash may be too long for your eye. The lash band will be slightly tacky when you remove the lash from the packaging. It will stick in place on your eye to fit the lash to your eye length.
Line up the band of the lashes on the inner part of your eye so it looks good and feels comfortable. Use your fingers to hold the outer end of the lashes to mark where the band should be shortened.
Remove the lash from your eye. Trim the band of the lash strip from its outer edge. Hold the lash to your eye again to check that the length is right.
Shadow
Apply your eye shadow.
Liner
Apply black pencil liner to your upper lash line to help
conceal the false lash band. Get the pencil in between the lashes to create a nice solid line. Tight lining is a great way to get good eye liner coverage in the lash line. Tight lining is applying eye liner from underneath the lash line instead of on top of the lash line.
Curl & Mascara
Curl your lashes, apply a coat of black mascara and let it dry. I prefer waterproof mascara because it tends to hold the lash curl better than non waterproof mascara. This creates the perfect guide to lay the strip lash on. My favorite waterproof mascara to Too Faced Better Than Sex Waterproof Mascara.
Click here to read Too Faced Better Than Sex Waterproof Mascara Review
Apply the Lashes
Hold the strip lash with tweezers or your fingers. Apply a thin layer of lash glue to the lash strip and let it become tacky. Wait 30 seconds to a minute. Apply the lash strip to the skin close to your upper lashes, press it gently in place, and hold it for a few seconds to set.
If the lash is not in the right place and feels uncomfortable, it will easily peel off so you can reapply it. You may need to touch up your shadow and liner before you reapply the lash.
Liner
Once your lashes are comfortably in place and dry, use an eye liner brush to apply black or dark brown powder eye shadow on top of the lash band to hide it.
How to Remove Strip Lashes
The lashes will peel off fairly easily when you are ready to remove them.
To create a more gentle removal with less tugging at the lash line, you can soften the glue with a hot wash cloth. Apply a hot wash cloth for a couple minutes to the lashes to soften the adhesive. Now peel the lash from the outer edge inward.
The lashes can be used again if they are not damage in the removal process. Gently peel the softened glue off of the lash band. Store the lashes in their original packaging.
Many stores carry Ardell lashes and adhesives. Find them at your local drug store, Sally Beauty, Bed, Bath and Beyond and Ulta. You can also find them at great prices on Amazon delivered right to you door.
Shop for Ardell Lashes on Amazon
Shop for Ardell Lashes on Amazon
That's all there is to it. Easy big eye drama!
Have a Beautiful Lash Day!
Thanks for using my amazon links💋
As an Amazon Associate, I earn from qualifying purchases at no cost to you. That keeps my blog running and supports the care of animals in need!😸 💄Need wedding makeup for your special day?
Contact me for on location wedding makeup, special occasion or everyday makeup and salon skin care services in the Philadelphia, Pa. area.
Contact me for on location wedding makeup, special occasion or everyday makeup and salon skin care services in the Philadelphia, Pa. area.


