
Hi Everyone!
 I started making protective fabric face masks and I want to share with you how to make an easy DIY washable fabric face mask with a filter pocket and pleats with an easy no measure way to make the pleats. I'll show you the pattern I use and give you 12 step instructions with images on how to make to make a filter pocket face mask with ear loops or ties.
This post includes:
✔The best fabric to use and why
✔3 No elastic strap options and how to make fabric ties for a mask
✔Directions on how to make a pleated face mask with a filter pocket and pleats in 12 steps
✔Links to my face mask tutorial video
✔Filter material options
✔Safest way to remove your face mask
I've made hundreds so far so I've figured out a few tricks to make them better and faster. I am crazy busy making them for people who are local to Delaware County, PA.
Visit Ricci Crafting Company on Facebook
I can't believe how many items are in shortage right now due to the COVID-19 Pandemic including elastic for making the straps on face masks!!! I've been waiting for an order for 4 weeks now. It is no where in sight!
So, I have three great elastic alternatives that I will share with you to help any of you trying to make masks for yourself, your friends and your family.
This post contains Amazon links to help you get the supplies you need delivered right to your door. When you use the links I provide for you, I earn a small amount at no cost to you. I truly thank you for using my links!😘
My mask style of choice is the pleated mask with a filter pocket to add extra protection. I feel this style of mask provides a high level of protection and it's fairly easy to breathe through. Also, a fabric face mask is washable so you can reuse it over and over which is great for our pocketbooks and earth friendly too.
It may look intimidating to sew, but I tried to make the process as easy as possible in 12 steps.
I have seen people do an elaborate process of measuring and pinning to make the pleats. I have a faster and easier way to create them just using an iron.
So what fabric should you use to make a face mask?
Therefore, the best materials for a DIY face mask may not be the highest filtering materials. They are the ones you will be able to wear more comfortably for a longer period of time.
Researchers at Cambridge University tested many materials for making face masks from vacuum cleaner bags to silk scarves. They tested how different materials filtered 1 micron particles and smaller 0.02 micron particles such as viruses.
For instance:
An N95 mask will filter 95% of small particles
A surgical mask will filter 89% of small particles
A vacuum cleaner bag will filter 86% of small particles
A dishtowel will filter 73% of small particles
A cotton blend T shirt will filter 70% of small particles
A pillowcase will filter 57% of small particles
Double layers of fabric slightly improved the percentage of filtration. The more layers of fabric, the harder it is to breath.
The bottom line is the best, most wearable materials to use for to make a DYI face mask are cotton blend and cotton fabrics such as T shirt material, pillowcases and sheet material.
Here is a link the an awesome post from SmartAir regarding the Cambrigde University Study on the best filtering most breathable materials for making a DIY face mask.
They have some very informative charts and info. It's definitely worth checking out.
I like using bandanas. They are 100% cotton, easy to work with, inexpensive, plus, I like the patterns and colors. I also like any tightly woven cotton or cotton blend material.
 Get bandanas on Amazon!
Always wash your fabric before sewing with it. 100% cotton will shrink a little. Plus, there are chemicals used in textile production that you shouldn't be breathing in.
Let's go over the different materials you can use to make the straps on a face mask.
The fabric tie straps tie at the back of your head making the mask highly adjustable for large and small head sizes. Because they are fabric, they are latex free. They are not hard to make, but they are time consuming.
Some people are using 1/4" ribbon or shoe laces instead of making fabric ties. It's a lot easier!
Option #2: Elastic Ear Loops
Elastic straps seem to be the most widely used material for fabric face masks but elastic is extremely difficult to find at this time. Elastic is easy to add to your mask creating those elastic loops the go around you ears. The problem is typical elastic contains latex so allergic people should avoid it. I also have had thin, lower quality elastic break on a few of my masks. Quite disappointing!
Option #3: Nylon or Polyester Ear Loops
You will know exactly what I'm talking about when I explain what they are. Do you remember weaving potholders using a loom when you were a kid? Those loops you used to make the pot holder are the craft loops I'm talking about.
 They can be made of nylon, polyester, cotton or wool. We want to use the polyester or nylon loops because they have some stretch. They are not as stretchy as elastic but they will work just fine and they are latex free. Plus, it is easy to tie a knot in them to make the mask fit tighter and they are fun, bright colors. I use them a lot on kid's masks. They create loops that go around your ears.
Get weaving loops on Amazon!
Option #4 Lycra Spandex Fabric Ear Loops
This is my latest favorite, no elastic, latex free option!!! It's the fabric that is used to make bathing suits. It's stretchy, durable and comfortable for ear loop straps. My friend said "who needs elastic!" after I told her to try it. You will need a big enough piece of fabric to cut two 6" long x 1/4" wide strips for one mask. 1/4 of a yard of fabric will give you plenty for a lot of masks.
Shop for Spandex Fabric on Amazon
I have put together a how to video showing you how to make an easy DIY Washable Fabric Face Mask with a Filer Pocket and Pleats. I know it helps to actually see it done.

🧵1- 8/2" x 15" piece of fabric
🧵2- 7" long pieces of elastic or nylon, or 2- 6" pieces of Spandex, or 4- 18" pieces of fabric or 1/4" ribbon
🧵thread
🧵scissors
🧵pins
🧵pencil
🧵ruler
🧵optional: paper to make a pattern
🧵an iron
🧵a sewing machine
Step 1: Prepare the Straps
Your choice: Elastic, Weaving Loops, Spandex Fabric, or Fabric Ties
 Elastic: Use 1/4" wide elastic. Cut two 7" long pieces of elastic.
Weaving Loops: Choose 2 loops to color coordinate with your mask fabric. Cut the loops so they are 7" in length. If they are very stretchy, make them 6 1/2".
Lycra Spandex Fabric: Cut the Spandex fabric into 1/4" wide strips.
 The best way to cut the strips is with a rotary fabric cutter. I have an Olfa Rotary Cutter the works great!
Shop on Amazon for an Olfa 45 mm Rotary Cutter
 The rotary cutter works best when you cut on a hard surface. I use a scrap piece of melamine particle board to cut on.
Cut the strips 6" long instead of 7" to make the Spandex straps.

Directions to make Fabric Strips:
Cut 4 strips of fabric 18" long by 3/4" wide. The long raw edges will need to be hidden so they don't fray.
Or cut 4 strips of 18" long ribbon.
 Fold a strip in half lengthwise and press making a crease in the center. Unfold the strip.
Fold one side of the long raw edges to the center ironed crease. Press.

Fold the other side of the long raw edges to the center ironed crease. Press.
Fold the strip in half again and press.

Stitch the seam closed close to the edge.

Step 2: Cut Fabric
Cut one 8 1/2" by 15" rectangle. I like to make a paper pattern to make it easier when making multiple face masks.
 Step 3: Fold in Half
Fold the rectangle in half with the right sides together.
Step 4: Measure the Filter Pocket Opening
Measure a 3" space in the middle of the raw edges on the opposite side of the folded side of the fabric. Mark the space with pins or make pencil markings on the fabric so you know to leave that area open when you sew that edge. This will be how you turn the mask inside out. It will also be the pocket opening to insert the filter.
Note: I originally made the opening 2" but found a 3" opening is better.

Step 5: Sew the Raw Edges
Sew the raw edges (with the pins or pencil marks) using a 1/4" seam allowance. Sew to the first pin or pencil mark. Leave the space open between the pins or pencil marks. Stitch the remaining seam after the second marking pin.
 This space will be the opening for a filter.
You can make the mask a little smaller by using a bigger seam allowance such as a 1/2" or 5/8".
Step 6: Center the Seam and Press
Move the filter pocket seam to the center of the mask and press the seam open. Ironing makes sewing neater and easier!
 Note: You can also move the filter pocket seam at the lower third of the mask.
I find the designs on certain fabrics look better from the front when the seam is moved to the lower third of the mask. Also, it makes ironing in half easier when thicker fabric is being used when the seam is lower on the mask.
Step 7: Trim the Corners
Cut the corners being careful not to cut into the sewn seam. I skip this step on thinner fabrics.

Step 8: Pin the Straps to the Mask
For Elastic or Weaving Loop Straps
The elastic, Spandex and the weaving loops are all attached to the mask in the same way. One elastic strip, or one Spandex strip or one weaving loop goes each one side of the mask. The elastic, Spandex or loops will be sandwiched inside between the two layers of fabric.
 Pin one end of the strap to the top right side corner and the other end to the bottom right corner so the end of the elastic or loop lines up with the raw edge of the fabric.
 Pin the other end of the strap to the top left side corner and the other end to the bottom left corner so the end of the elastic or loop lines up with the raw edge of the fabric.
Fabric Strips or Ribbon
The fabric strips or ribbon will attach to each corner but on the inside in between the layers of fabric.
 Sandwich the strips inside the two layers of fabric. Match the end of each strip with the raw edge and pin in place.
All the strap options pinned will look like this.

Step 9: Sew the Sides of the Mask
Sew the sides of the mask to secure the straps and close the seam. Back stitch the straps to reinforce them. Be careful not to get the loose unpinned part of the straps caught up and sewn in the seam.

Step 10: Turn Inside Out
Turn the mask inside out through the 3" opening. Use your fingers to push the corners out.

Step 11: Make the Pleats
This is an easy, no measure way to make the pleats in your face mask using an iron.
Have the mask so that the seam with the opening is facing up.
Press the mask so it is flat and neat.
 Next, fold the mask in half horizontally and press the folded edge making a crease. Unfold the mask.
 Now, fold the lower edge to meet the center crease. Press the folded edge making another crease.
 Fold the upper edge to meet the center crease. Press the folded edge making another crease.
Flip the mask over. These creases will make it easy to make the pleats without measuring.
 Take the bottom crease and fold it half way between the middle and bottom crease. Pin in place.
 Take the middle crease and fold it half way between the middle and top crease. Pin in place.
Take the top crease and fold it half way between the top crease and the top edge of the fabric. Pin in place.
It looks like this.

Step 12: Sew the Sides
Sew the sides using a 1/4" seam allowance.

That's it! It's done!

View my Video


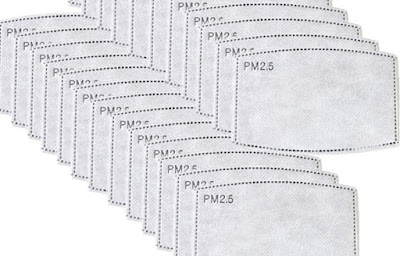
Charcoal Filters
The filters that are made use in a reusable DYI face mask are generally activated charcoal filter paper that are not washable. They will improve the percentage of filtration in a face mask and they are made to be breathable. They are a hot commodity so they are hard to find. You can try Amazon.
Coffee Filters
I also heard that people are using coffee filters. They can filter an additional 21.4% of small particles.
Blue Shop Towels
My Favorite Choice!
 People are also using blue Shop Towels. These disposable towels that are thick and feel like cloth are made of a polyester hydro knit. They can be cut and used as a filter in the pocket of a face mask. They seem to add significantly more filtration to a filter pocket face mask and they are easy to find and use. You can find Shop Towels in home supply stores such as Home Depot and on Amazon.
Heater Filters
 You can deconstruct a heater filter and cut up the HEPA material to use as a filter in your mask. It needs to be a high filtration filter that removes small particles such as allergens. Look for filters that are FPR 10 or MPR 600.
 There has wire in it so you need to gently peel the fabric from the wire. The other issue is that these types of filters can contain fiberglass so they should be used very carefully and only between the fabric layers of a mask.
Change your Filter
Whatever kind of filter you choose to use, you will need change that filter every time you wash your mask. Really, you should wash your mask each time you wear it out. It's a good idea to have several masks so you can always have a clean one available to wear.
When you come back home, you feel like you want to rip that mask off right away, but wait!
Don't touch the mask that is on your face wash until you have washed your hands for 20 seconds with soap and warm water to remove any contaminants.
Grab the straps around your ears or untie the ties and remove the mask by holding the straps.
Immediately spray the mask with disinfectant or better, machine wash or hand wash in warm/hot water to remove any virus on the mask. Dry the mask in the dryer so it is clean and ready for the next wear. Remove your filter before washing and drying.
I hope this post helps you create your own DIY washable fabric face mask with a filter pocket and pleats and also helps you get the best filter materials for your mask to keep you and your family safe in this extremely difficult time.
To my local friends, I can make a mask for you if you need one! Visit Ricci Crafting Company on Facebook.


This post includes:
✔The best fabric to use and why
✔3 No elastic strap options and how to make fabric ties for a mask
✔Directions on how to make a pleated face mask with a filter pocket and pleats in 12 steps
✔Links to my face mask tutorial video
✔Filter material options
✔Safest way to remove your face mask
I've made hundreds so far so I've figured out a few tricks to make them better and faster. I am crazy busy making them for people who are local to Delaware County, PA.
Visit Ricci Crafting Company on Facebook
I can't believe how many items are in shortage right now due to the COVID-19 Pandemic including elastic for making the straps on face masks!!! I've been waiting for an order for 4 weeks now. It is no where in sight!
So, I have three great elastic alternatives that I will share with you to help any of you trying to make masks for yourself, your friends and your family.
This post contains Amazon links to help you get the supplies you need delivered right to your door. When you use the links I provide for you, I earn a small amount at no cost to you. I truly thank you for using my links!😘
My mask style of choice is the pleated mask with a filter pocket to add extra protection. I feel this style of mask provides a high level of protection and it's fairly easy to breathe through. Also, a fabric face mask is washable so you can reuse it over and over which is great for our pocketbooks and earth friendly too.
It may look intimidating to sew, but I tried to make the process as easy as possible in 12 steps.
I have seen people do an elaborate process of measuring and pinning to make the pleats. I have a faster and easier way to create them just using an iron.
So what fabric should you use to make a face mask?
Best Fabric To Use to Make a DIY Washable Face Mask with a Filter Pocket and Pleats
Some materials you can use to make a face mask filter small particles, like the COVID-19 Corona Virus, better than others. The issue is, some of the materials are stiffer and uncomfortable. They also can be difficult to breath through. A person who has breathing issues to begin with, such as asthma, would never be able to tolerate a face mask that is hard to breath through.Therefore, the best materials for a DIY face mask may not be the highest filtering materials. They are the ones you will be able to wear more comfortably for a longer period of time.
Researchers at Cambridge University tested many materials for making face masks from vacuum cleaner bags to silk scarves. They tested how different materials filtered 1 micron particles and smaller 0.02 micron particles such as viruses.
For instance:
An N95 mask will filter 95% of small particles
A surgical mask will filter 89% of small particles
A vacuum cleaner bag will filter 86% of small particles
A dishtowel will filter 73% of small particles
A cotton blend T shirt will filter 70% of small particles
A pillowcase will filter 57% of small particles
Double layers of fabric slightly improved the percentage of filtration. The more layers of fabric, the harder it is to breath.
The bottom line is the best, most wearable materials to use for to make a DYI face mask are cotton blend and cotton fabrics such as T shirt material, pillowcases and sheet material.
Here is a link the an awesome post from SmartAir regarding the Cambrigde University Study on the best filtering most breathable materials for making a DIY face mask.
They have some very informative charts and info. It's definitely worth checking out.
I like using bandanas. They are 100% cotton, easy to work with, inexpensive, plus, I like the patterns and colors. I also like any tightly woven cotton or cotton blend material.
Always wash your fabric before sewing with it. 100% cotton will shrink a little. Plus, there are chemicals used in textile production that you shouldn't be breathing in.
Let's go over the different materials you can use to make the straps on a face mask.
Face Mask Straps: 3 No Elastic Options
Option #1: Fabric Tie Straps or Ribbon StrapsThe fabric tie straps tie at the back of your head making the mask highly adjustable for large and small head sizes. Because they are fabric, they are latex free. They are not hard to make, but they are time consuming.
Some people are using 1/4" ribbon or shoe laces instead of making fabric ties. It's a lot easier!
Option #2: Elastic Ear Loops
Elastic straps seem to be the most widely used material for fabric face masks but elastic is extremely difficult to find at this time. Elastic is easy to add to your mask creating those elastic loops the go around you ears. The problem is typical elastic contains latex so allergic people should avoid it. I also have had thin, lower quality elastic break on a few of my masks. Quite disappointing!
Option #3: Nylon or Polyester Ear Loops
You will know exactly what I'm talking about when I explain what they are. Do you remember weaving potholders using a loom when you were a kid? Those loops you used to make the pot holder are the craft loops I'm talking about.
Get weaving loops on Amazon!
Option #4 Lycra Spandex Fabric Ear Loops
This is my latest favorite, no elastic, latex free option!!! It's the fabric that is used to make bathing suits. It's stretchy, durable and comfortable for ear loop straps. My friend said "who needs elastic!" after I told her to try it. You will need a big enough piece of fabric to cut two 6" long x 1/4" wide strips for one mask. 1/4 of a yard of fabric will give you plenty for a lot of masks.
Shop for Spandex Fabric on Amazon
I have put together a how to video showing you how to make an easy DIY Washable Fabric Face Mask with a Filer Pocket and Pleats. I know it helps to actually see it done.
How to Make a DIY Washable Fabric Face Mask with a Filter Pocket and Pleats in 12 Steps Directions
Supplies:🧵1- 8/2" x 15" piece of fabric
🧵2- 7" long pieces of elastic or nylon, or 2- 6" pieces of Spandex, or 4- 18" pieces of fabric or 1/4" ribbon
🧵thread
🧵scissors
🧵pins
🧵pencil
🧵ruler
🧵optional: paper to make a pattern
🧵an iron
🧵a sewing machine
Step 1: Prepare the Straps
Your choice: Elastic, Weaving Loops, Spandex Fabric, or Fabric Ties

Weaving Loops: Choose 2 loops to color coordinate with your mask fabric. Cut the loops so they are 7" in length. If they are very stretchy, make them 6 1/2".
Lycra Spandex Fabric: Cut the Spandex fabric into 1/4" wide strips.

Shop on Amazon for an Olfa 45 mm Rotary Cutter
Cut the strips 6" long instead of 7" to make the Spandex straps.

Directions to make Fabric Strips:
Cut 4 strips of fabric 18" long by 3/4" wide. The long raw edges will need to be hidden so they don't fray.
Or cut 4 strips of 18" long ribbon.

Fold one side of the long raw edges to the center ironed crease. Press.

Fold the other side of the long raw edges to the center ironed crease. Press.
Fold the strip in half again and press.

Stitch the seam closed close to the edge.

Cut one 8 1/2" by 15" rectangle. I like to make a paper pattern to make it easier when making multiple face masks.

Fold the rectangle in half with the right sides together.
Step 4: Measure the Filter Pocket Opening
Measure a 3" space in the middle of the raw edges on the opposite side of the folded side of the fabric. Mark the space with pins or make pencil markings on the fabric so you know to leave that area open when you sew that edge. This will be how you turn the mask inside out. It will also be the pocket opening to insert the filter.
Note: I originally made the opening 2" but found a 3" opening is better.

Step 5: Sew the Raw Edges
Sew the raw edges (with the pins or pencil marks) using a 1/4" seam allowance. Sew to the first pin or pencil mark. Leave the space open between the pins or pencil marks. Stitch the remaining seam after the second marking pin.

You can make the mask a little smaller by using a bigger seam allowance such as a 1/2" or 5/8".
Step 6: Center the Seam and Press
Move the filter pocket seam to the center of the mask and press the seam open. Ironing makes sewing neater and easier!

I find the designs on certain fabrics look better from the front when the seam is moved to the lower third of the mask. Also, it makes ironing in half easier when thicker fabric is being used when the seam is lower on the mask.
Step 7: Trim the Corners
Cut the corners being careful not to cut into the sewn seam. I skip this step on thinner fabrics.

Step 8: Pin the Straps to the Mask
For Elastic or Weaving Loop Straps
The elastic, Spandex and the weaving loops are all attached to the mask in the same way. One elastic strip, or one Spandex strip or one weaving loop goes each one side of the mask. The elastic, Spandex or loops will be sandwiched inside between the two layers of fabric.


The fabric strips or ribbon will attach to each corner but on the inside in between the layers of fabric.

All the strap options pinned will look like this.

Step 9: Sew the Sides of the Mask
Sew the sides of the mask to secure the straps and close the seam. Back stitch the straps to reinforce them. Be careful not to get the loose unpinned part of the straps caught up and sewn in the seam.

Step 10: Turn Inside Out
Turn the mask inside out through the 3" opening. Use your fingers to push the corners out.

Step 11: Make the Pleats
This is an easy, no measure way to make the pleats in your face mask using an iron.
Have the mask so that the seam with the opening is facing up.
Press the mask so it is flat and neat.


Flip the mask over. These creases will make it easy to make the pleats without measuring.


Take the top crease and fold it half way between the top crease and the top edge of the fabric. Pin in place.
It looks like this.

Step 12: Sew the Sides
Sew the sides using a 1/4" seam allowance.

That's it! It's done!

View my Video


If you like my creamy red nail color in my pics, I'm wearing, Zoya Sheri!
Filter Materials for a DIY Washable Fabric Face Mask with a Filter Pocket and Pleats
The filter pocket in this face mask allows you to slip a filter between the layers of fabric to give you even more protection. So what can you use as a filter?Charcoal Filters
The filters that are made use in a reusable DYI face mask are generally activated charcoal filter paper that are not washable. They will improve the percentage of filtration in a face mask and they are made to be breathable. They are a hot commodity so they are hard to find. You can try Amazon.
Coffee Filters
I also heard that people are using coffee filters. They can filter an additional 21.4% of small particles.
Blue Shop Towels
My Favorite Choice!
Heater Filters

Change your Filter
Whatever kind of filter you choose to use, you will need change that filter every time you wash your mask. Really, you should wash your mask each time you wear it out. It's a good idea to have several masks so you can always have a clean one available to wear.
Tips for Removing your Mask
When you come back home, you feel like you want to rip that mask off right away, but wait!
Don't touch the mask that is on your face wash until you have washed your hands for 20 seconds with soap and warm water to remove any contaminants.
Grab the straps around your ears or untie the ties and remove the mask by holding the straps.
Immediately spray the mask with disinfectant or better, machine wash or hand wash in warm/hot water to remove any virus on the mask. Dry the mask in the dryer so it is clean and ready for the next wear. Remove your filter before washing and drying.
I hope this post helps you create your own DIY washable fabric face mask with a filter pocket and pleats and also helps you get the best filter materials for your mask to keep you and your family safe in this extremely difficult time.
To my local friends, I can make a mask for you if you need one! Visit Ricci Crafting Company on Facebook.
#stayhealthy, #staysafe, #withme
xo
Licensed Cosmetologist, Esthetician, Makeup Artist, Creative Spirit
Wedding, special occasion or everyday makeup and skin care services available in the Philadelphia, Pa. area. Visit my makeup page for more information!
Thanks for using my amazon links💋
As an Amazon Associate, I earn from qualifying purchases at no cost to you. That keeps my blog running and supports the care of animals in need!😸